
Guys, I am SO excited to share this homemade marshmallow recipe with you.
I mean, c'mon: homemade marshmallows? Are you kidding me? How cool is that?!?

I have wanted to make these fluffy, white pillows of sweetness for years, but always shied away from them for some reason. But, once I perfected my hot chocolate mix, I knew it was time to step up my game.
I mean - what goes better with delicious homemade hot chocolate than amazingly fluffy, homemade marshmallows, right?
Speaking of which...now I totally wanna go make some s'mores, too!

Plus -- the girls totally FLIPPED when I told them I was going to make marshmallows. I was like the coolest mom EVER for a good week or two. They'd come home from school and ask to have a single marshmallow as a snack. And I'd totally let them.
Truthfully, I'm not sure who was more excited - them or me.
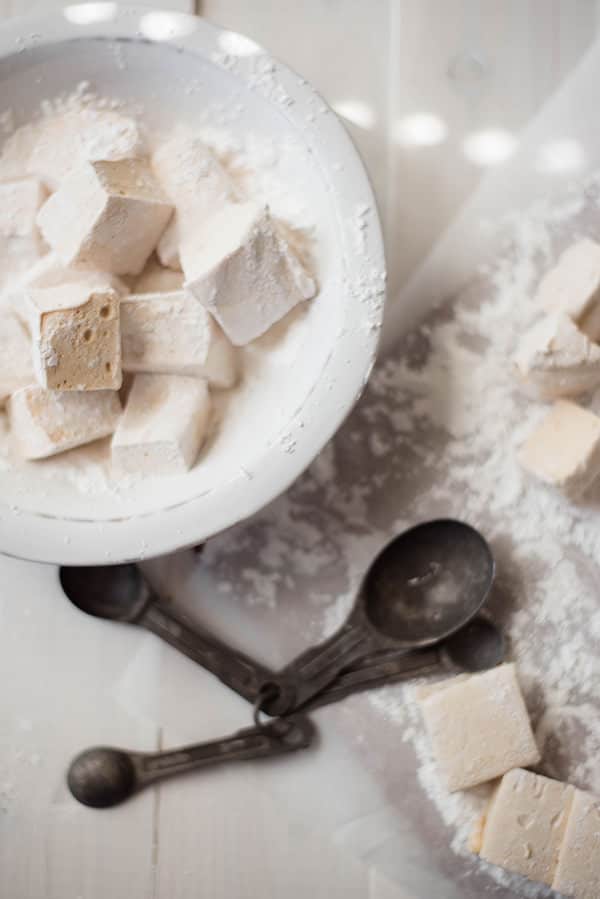
This marshmallow recipe is fairly simple to make. Once you put it in the mold, though, it does take 8 or so hours to set, so make sure you plan ahead. I just leave mine overnight and then I have perfect homemade marshmallows the next day.

I chose to make these marshmallows without corn syrup and they came out super fluffy, chewy and delicious. Plus, there's the added coolness that you just made your own marshmallows and that doesn't wear off until after you've eaten like 10 or 15 of them. Because, hey, they are still marshmallows. And 10 is too many to eat in a row. Even if homemade.
Also, FYI it's a messy process so make sure you have plenty of clean counter space available as it's virtually impossible to not make at least a little mess when using cornstarch and powdered sugar.
Really, though, that's part of the fun.
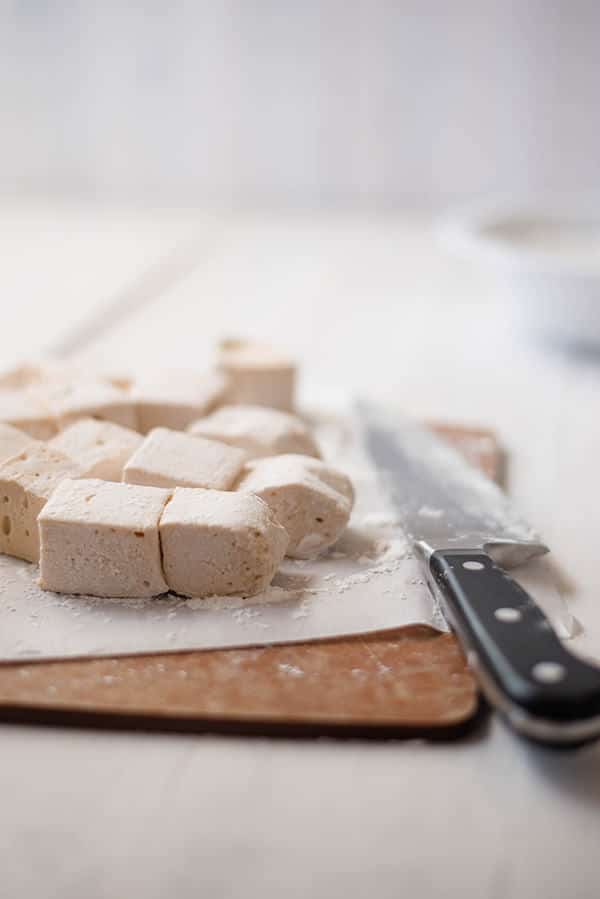
I just cut mine into large cubes (perfect for a single marshmallow in a mug), but you could also get all creative and use a cookie cutter to make shapes, like hearts and other cookie-cutter cuteness.
They taste like the real deal and are soooo much better and fresher than the marshmallows you buy in the store.

Be sure you have a candy thermometer as it will be necessary to make sure the mixture gets to the right temperature while cooking. Candy thermometers are super handy and only cost a few dollars so they are totally worth it. Plus, you can use them to make other tasty sweets, like this toffee.
Homemade Marshmallow Recipe (Without Corn Syrup!)
*This post may contain affiliate links for products I use often and highly recommend.
Ingredients
- Cooking spray or vegetable oil enough to grease pan
- ½ cup plus ¼ cup water divided
- 3 tablespoon unflavored powdered gelatin 3 packets
- 2 cups granulated sugar
- ½ cup evaporated milk
- 1 tablespoon vanilla extract
- 1½ cups powdered sugar
- 2 tablespoon cornstarch
Instructions
- Spray an 8x8, 9x13 or similar baking pan with the cooking spray or generously grease using vegetable oil. Then, lay a sheet of parchment paper inside the pan, making sure all inner sides of the pan are covered. Depending on the size of your baking pan, you may need to use two sheets, criss-crossed. You should have 1-2 inches overhanging the pan, as this will be how you pull the marshmallows out of the pan once they have set.
- Pour ½ cup of the water into the bowl of a stand mixer fitted with a whisk attachment. Add the gelatin to the water and allow to soften, about 10 minutes.
- In a large, deep saucepan, combine the sugar, evaporated milk, and ¼ cup water. Stir over medium-heat until the sugar has dissolved.
- Bring the water/sugar mixture to a gentle boil. Then, reduce to a simmer, without stirring, and allow to cook until a candy thermometer registers 240 degrees, about 10-15 minutes. Make sure the heat is not too high or the mixture will burn while cooking.
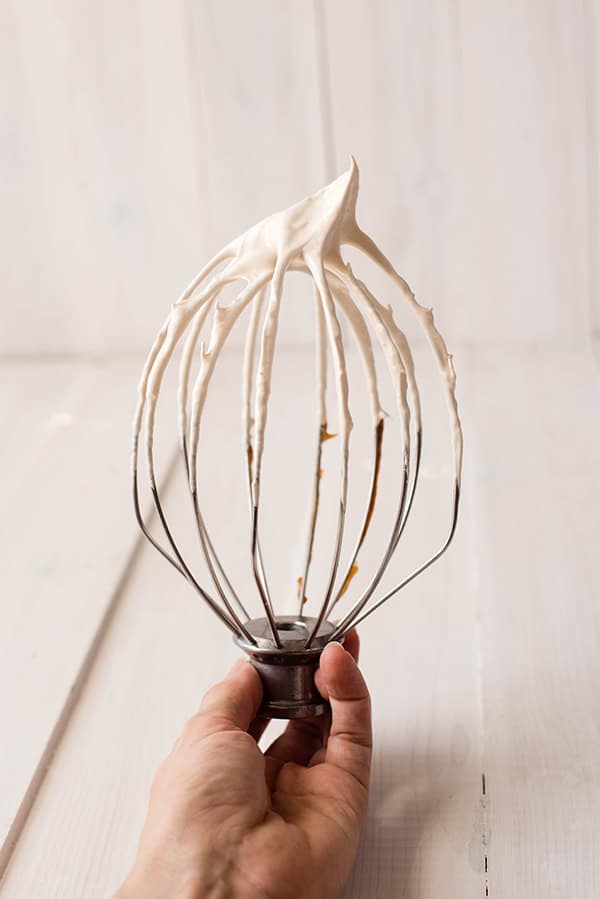
- Carefully, add the hot sugar mixture to the gelatin mixture and beat on low speed until fully incorporated. You'll note the mixture is an amber color -- this is totally normal. Once it starts to get whipped, it will turn into a creamy, shiny, white-ish color.
- Add vanilla extract.
- Increase the speed to high and beat until very thick and fluffy, about 10-15 minutes. The mixture will double to triple in size and will be a creamy, shiny, white-ish color.
- Using a rubber spatula, quickly scrape out the mixture into the baking pan lined with parchment paper. The mixture will set quickly, so try to do this as fast as possible. It will be difficult to get every last drop of the marshmallow mixture out of the mixing bowl, so just get what you can. Then, using the spatula, press the mixture down into all the corners of the pan. Finally, smooth out the top as best as you can.
- Using a final sheet of parchment paper, lay over the top of the mixture. Using your hands, gently press this sheet down over the top so the mixture sticks to it. This will prevent all sides of the marshmallows from getting dried out while they are setting.
- Allow to set (not refrigerated) for at least 8 hours, preferably overnight.
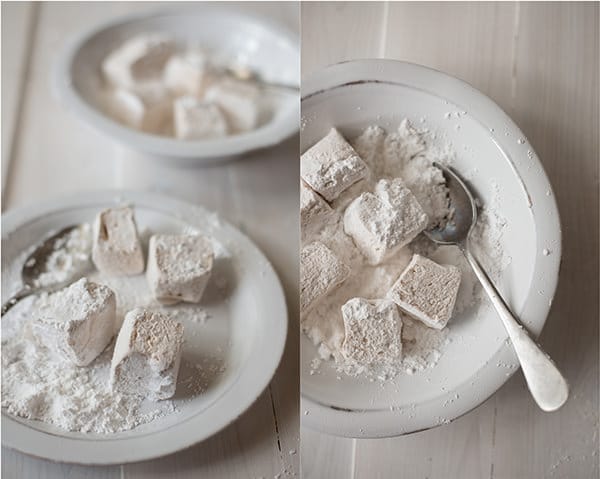
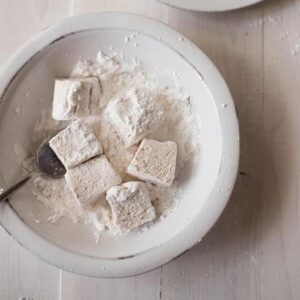
- After the marshmallows have set, combine the powdered sugar and cornstarch in a large bowl and whisk together.
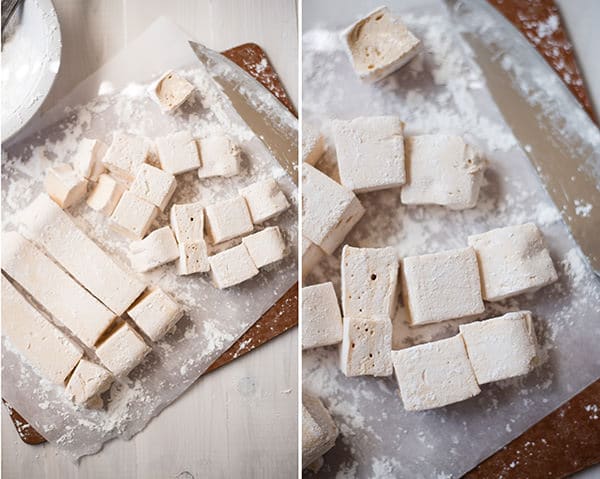
- Spoon some of the mixture over the top of the marshmallows and over a cutting board. Using the overhanging parchment paper, remove the marshmallows from the pan and place onto your board. Carefully peel the paper off the marshmallows.
- Using a large, sharp knife, cut the marshmallows into 1-inch squares. The very edges may have dried out too much from setting overnight, so just cut them off and discard as necessary.
- Add the marshmallows to the powdered sugar and cornstarch mixture and dust all sides to prevent sticking.
- Store in an airtight container for several weeks.
Nutrition
Jane Doe
There isn't a single seller anywhere who makes marshmallows with marshmallow root. I would absolutely be a purchaser if there was though, because suffering from chronic constipation and knowing the benefits of marshmallow root.... I'd far rather eat a couple marshmallows a day than rely on something like metmucil or miralax :/
Nettie
Please clarify do I use 3 tablespoons of gelatin plus an additional 3 packets of gelatin? TIA
Barbara
No one or the other
Kim Floyd
I am wanting these to top cupcakes for a wedding and I want to use a torch to brown the tops. are they firm enough to stay on top of a cool cupcake or will they be super melty?
Annie
Would it work even with flavoured gelatine? I was thinking of giving the marshmallows a strawberry flavour that way.
Gregory Anderson
Oh, my wife will wig-out when I make these for Valentine's! Thank you.
Lacey Baier
Yay! I hope she loves them 🙂
Judy
These l look wonderful! I've been reading marshmallow recipes for several months now, looking for ones that don't have corn syrup. I wonder if I could use the syrup I get from boiling down marshmallow root in place of the evaporated milk? or Can these be made with water to replace the evaporated milk? or perhaps using coconut milk? It is not so much that I'm dairy free, as I don't really want the dairy flavor. Most recipes don't call for milk ingredient. I am gearing up to give a marshmallow recipe a try. This might be it! Thanks
Lacey Baier
Hi Judy! The evaporated milk really helps to make the marshmallows nice and fluffy, since I didn't use egg whites or corn syrup in this recipe. I've never tried replacing with boiled marshmallow root or coconut milk, but I wouldn't consider these marshmallows to contain much of a dairy flavor if that's what most concerns you. If you try it out, I'd love to know what you choose and how it turns out for you 🙂
Lacey Baier
Thanks! Glad you like the pics.
Dustin
I really like these pictures and I know Jordan loves the mellows 🙂